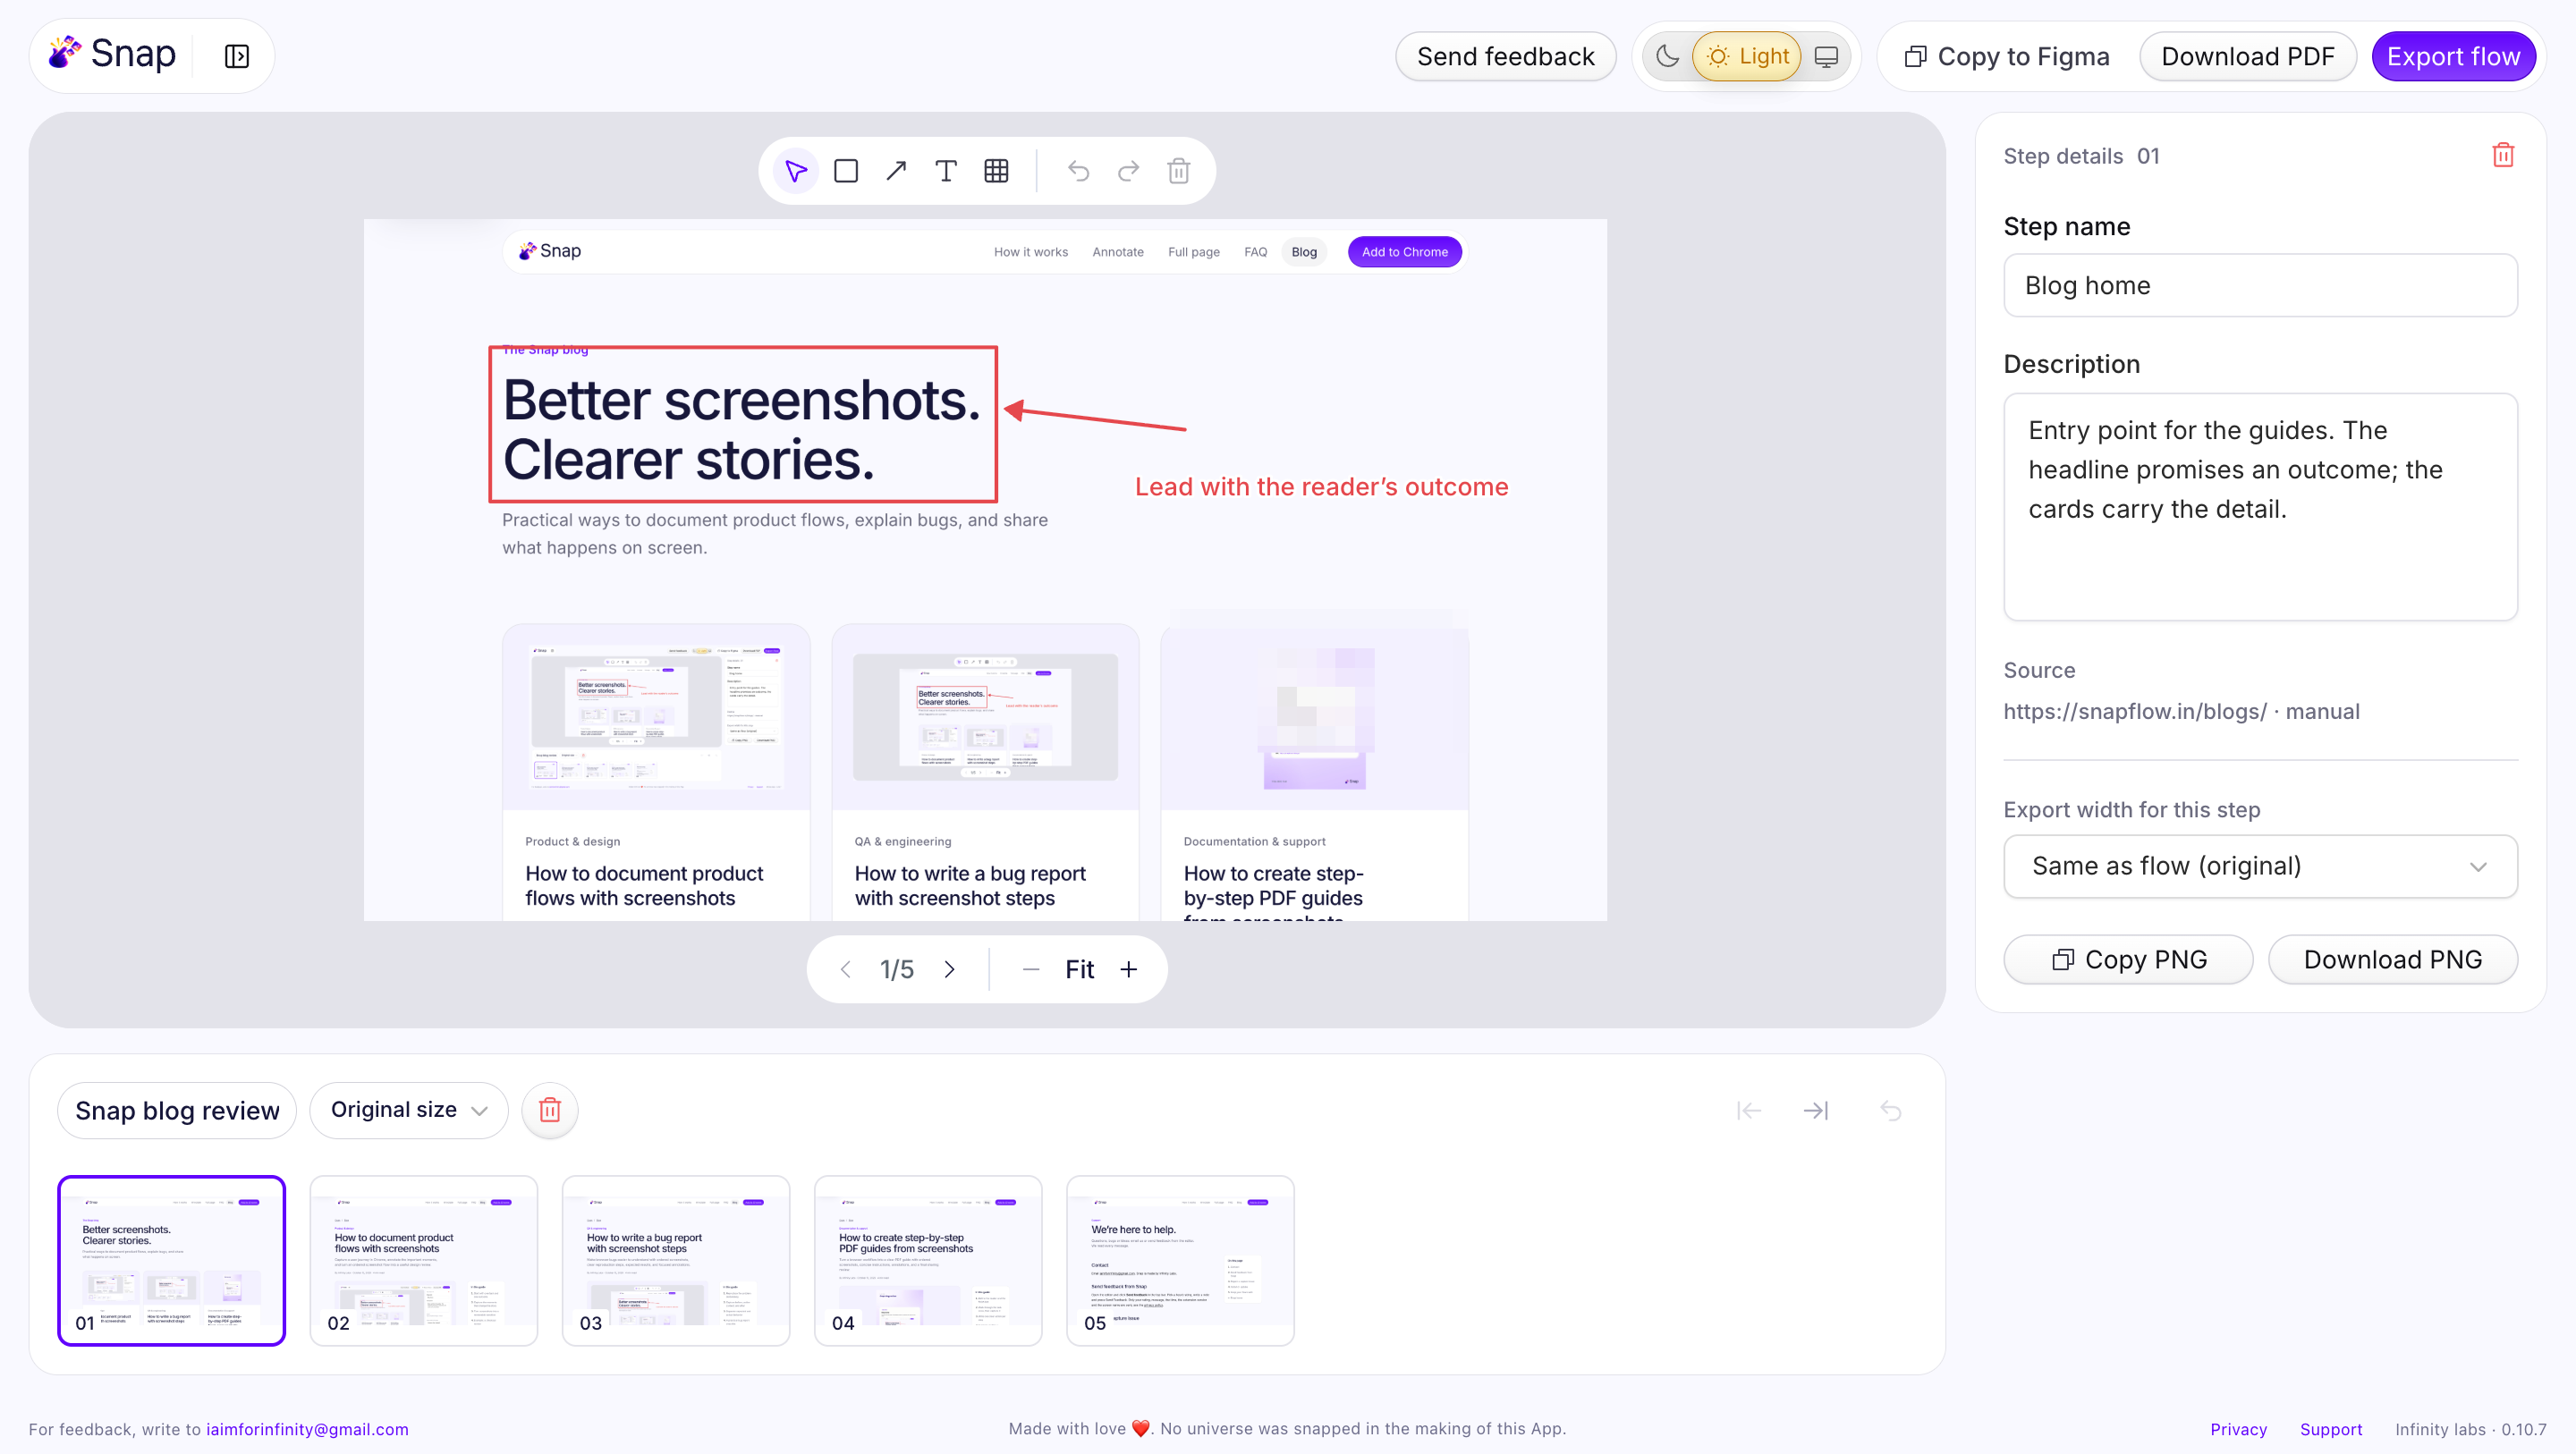
The first screenshot is easy to find. By the eighth, you are checking thumbnails to remember which one came before the filter was applied.
This happens whenever you capture a process rather than a single page: comparing products, documenting a bug or explaining how to change a setting.
To take multiple screenshots in Chrome, capture each relevant page or state, keep the images in sequence and label what changed. You can do this with a regular screenshot tool and a dedicated folder, or use Snap to keep the captures in a single flow.
Here are both methods.
First, decide what “multiple screenshots” means
There are three different tasks that often get grouped together:
| Your goal | Capture approach |
|---|---|
| Save the complete length of one page | Use full-page capture |
| Show several steps or states of a task | Capture each state as a separate screenshot |
| Automatically capture many URLs or tabs | Look for a batch capture tool |
This guide covers the second task: collecting a sequence as you move through Chrome. Snap uses manual capture; it is not an unattended bulk-URL screenshot service.
Method 1: use a screenshot tool and a dedicated folder
This works well for a short sequence, especially if you already have a capture tool you like.
1. Create the folder before you begin
Give it a task-based name, such as Search filters review or Update billing address.
Keep the screenshots separate from unrelated downloads. If you are comparing products, use one folder per product or clearly separate their sequences.
2. Capture the first useful state
Open the page and use your preferred screenshot tool to capture the visible area or selected region. Wait for the page to settle unless loading behavior is part of what you need to show.
Keep the same browser size and zoom throughout the sequence.
3. Name each capture in order
Use a number and a short description:
01-search-results.png
02-filter-open.png
03-filter-applied.png
04-no-results.png
05-filters-cleared.png
Numbering makes the sequence explicit. A timestamp can tell you when a capture happened, but not what that capture explains.
4. Add the context outside the image
Keep a short note with the source URL, capture date and any setup that matters. For a bug, include the actions that produced it and the expected result.
Import the images into your document or design file when you are ready to review them.
The tradeoff: you manage the names, order and accompanying notes yourself. That may be entirely reasonable for three images; it becomes more work across longer or repeated capture sessions.
Method 2: keep multiple Chrome screenshots in a Snap flow
Disclosure: We make Snap. This method uses its manual capture and export workflow.
1. Install Snap and open the website
Install Snap from the Chrome Web Store on your computer, then open the normal webpage you want to document.
Snap is a desktop Chrome extension. Browser-internal pages are excluded, and Chrome may require you to open Snap again when moving to another site.
2. Name the task
Open Snap, name the flow and choose Start Snapping. A capture toolbar appears on the page.
Use a name that will still make sense later. “Search with no results” is more useful than “Screenshots 2.”
3. Capture the states that matter
Move through the task and trigger a capture whenever you reach a state worth keeping. Choose visible-area, selected-region or full-page capture according to what you need to show.
For the search example, you might capture the initial results, the open filter, the applied filter, the empty state and the result after clearing filters.
You choose each capture. Snap does not automatically take a screenshot of every click.
4. Review the sequence
Finish the capture session, then remove duplicates, reorder steps and rename unclear titles. Add a note when the transition needs explaining.
A useful note might read: “Selecting this filter produces zero results, but the page does not offer a way to clear it from the empty state.”
5. Annotate and check sensitive details
Add a box, arrow or text label to identify the specific detail you want the reader to notice. Keep the markup focused enough that the underlying interface remains readable.
Use redaction where needed, and inspect the exported result before sending it. Snap retains the original capture in its editor even when an exported area is pixelated.
6. Export for the person receiving it
| Output | Use it when… |
|---|---|
| Someone needs to read the sequence as a document | |
| ZIP | Someone needs the numbered image files |
| Copy to Figma | The design team needs screenshot frames on its canvas |
| Individual PNG | One image belongs in a ticket or message |
Snap stores flows locally in your Chrome profile. Export important work before uninstalling the extension or clearing browser data. Sharing happens through the exported file or the design file you paste into; Snap does not create a hosted flow link.
Avoid these common capture mistakes
Capturing only the final state. If the previous action explains the problem, include it.
Changing the layout halfway through. Different browser widths can make a comparison confusing. Record deliberate changes separately.
Keeping every duplicate. Capture freely while working, then remove images that add no information.
Using full-page capture for every detail. A long image may shrink the exact label or error you need someone to read. Add a closer capture when necessary.
Frequently asked questions
Can Snap automatically screenshot every open tab?
Snap is designed for manually chosen captures grouped into a flow. If your goal is unattended capture of a list of URLs or all tabs, compare tools that explicitly support batch capture.
Can I take several screenshots without installing an extension?
Yes. Use your existing screenshot tool, save the images into a dedicated folder and number them in order. Add the source and explanatory notes separately.
Can I combine the sequence into one PDF?
Yes. With Snap, review the captured flow and export it as a PDF. If you already have separate image files, use a tool that supports combining images into a PDF. Check the final order and readability before sharing.
Have a task to document? Start a flow with Snap and keep the next capture beside the one that came before it.
Related reading: Create step-by-step PDF guides from screenshots.